Always losing count of computers in the office? Rummaging through dusty cabinets to find out when your software license expires? Or maybe the newcomer's new computer is experiencing software issues, and you're having trouble keeping track of all the face-to-face, phone, and mail conversations? How about giving Ragic's free IT Help Desk template a shot?
The IT Help Desk template is one of a series of free-to-use templates from Ragic. The IT Help Desk template deals with two basic IT needs: (1) asset management, which can tell you how many computers you have, who's using them, what software licenses you own, and when they need to be renewed; and (2) IT request report, which replaces the traditional face-to-face, phone, or mail interactions. People who need help can simply fill out an online form, and users can check online for the progress to make tracking simpler and more efficient.
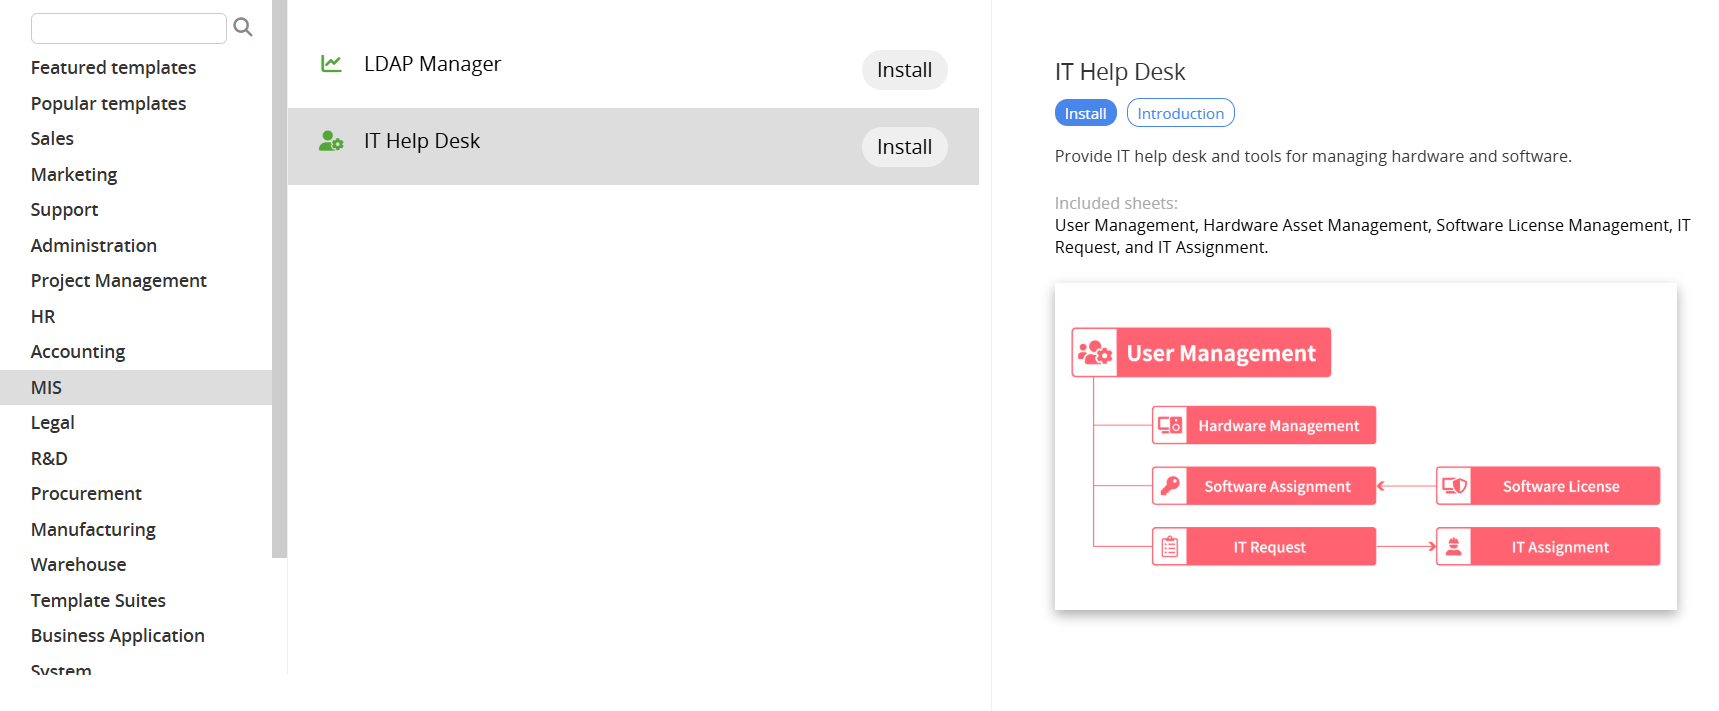
If you don’t have a Ragic account, click here to sign up and install the "IT Help Desk" template. This entire process is free, and we will not charge you without your consent.
If you are already a Ragic user, you can find the "IT Help Desk" template under the "MIS" category in Install Templates and click "Install" to download it.
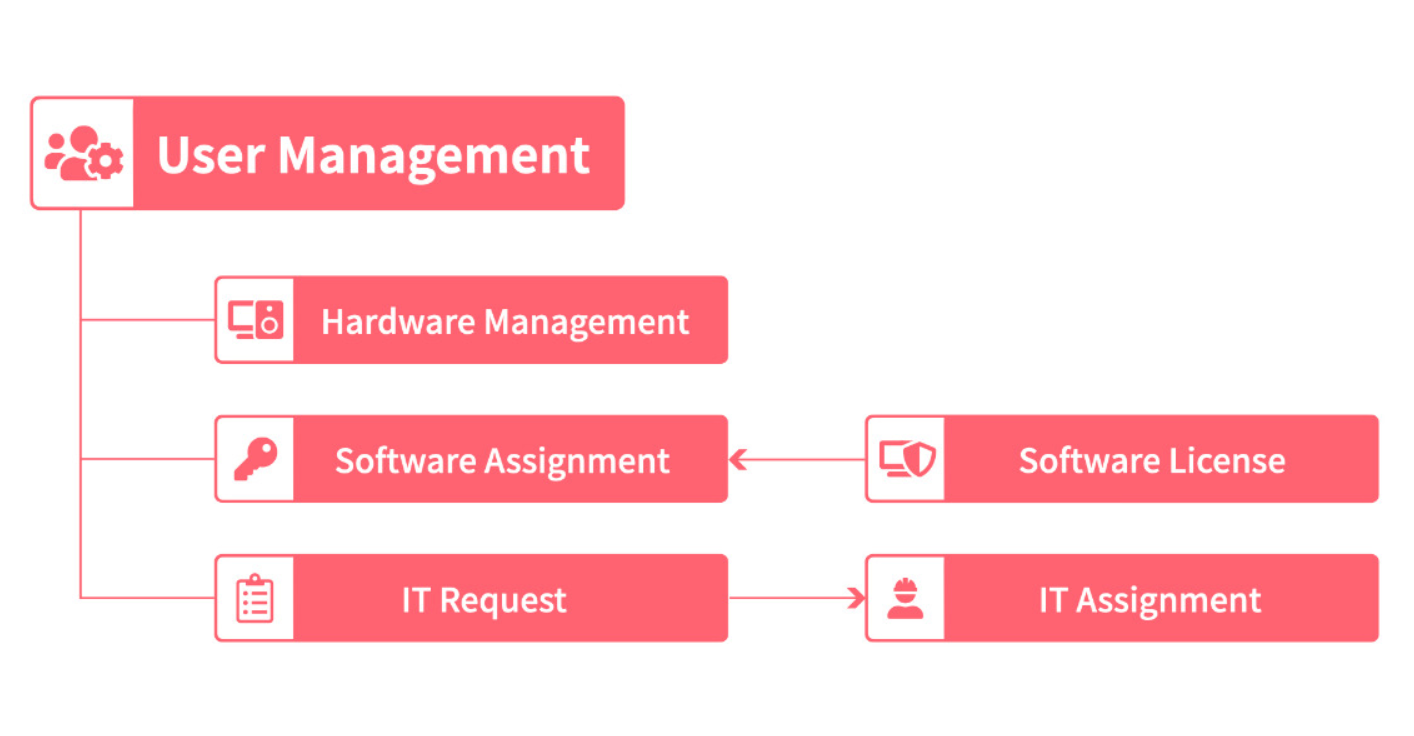
The "IT Help Desk" template includes six sheets, four of which center around information management: "User Management", "Hardware Asset Management", "Software License Allocation", and "Software License Management", and two around process management: "IT Request" and "IT Assignment". The sheets are aimed at providing a mechanism for recording and tracking internal IT asset allocation. When the staff runs into problems, the sheets allow them to quickly submit a request so the IT personnel can efficiently solve the problem. The process is shown as follows:
In general, company or organization staff are all users of IT assets, and this user information must be compiled into a sheet to make it easier to assign assets and manage service requests later. When the need arises, you just have to take a glance at the user management sheet to know which devices are in whose hands.
The figure below shows the "IT User Management" sheet, which is split into three major sections: "Basic Information", installed "Hardware", and assigned "Software".
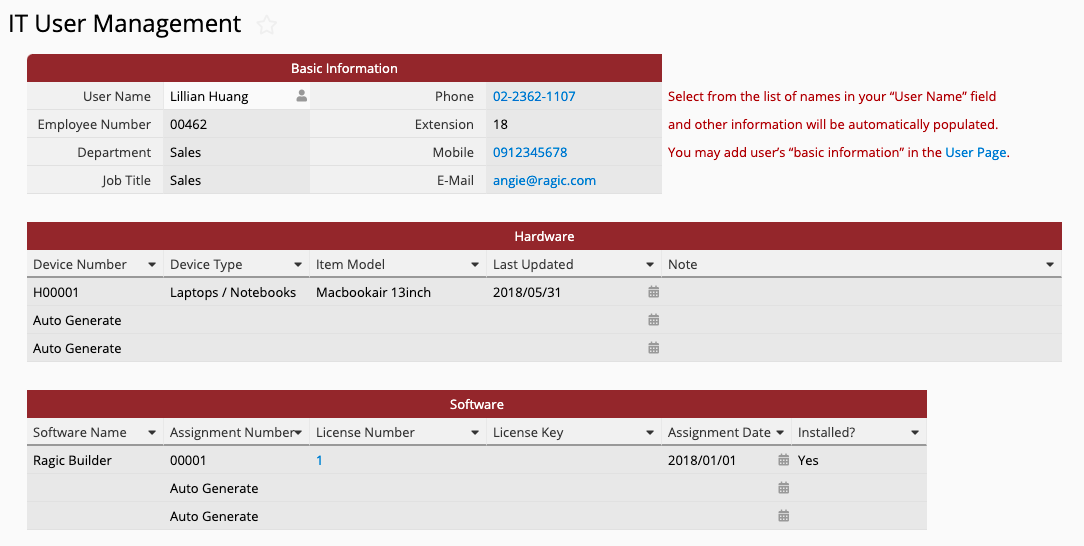
Most of the fields are greyed out, meaning they are Read Only fields that are automatically filled without requiring manual input. So, it's very simple to create an entry for a user for the first time: just click the only writeable field, "Employee ID", and you’ll be led to the "Employee Management" sheet to create new users.
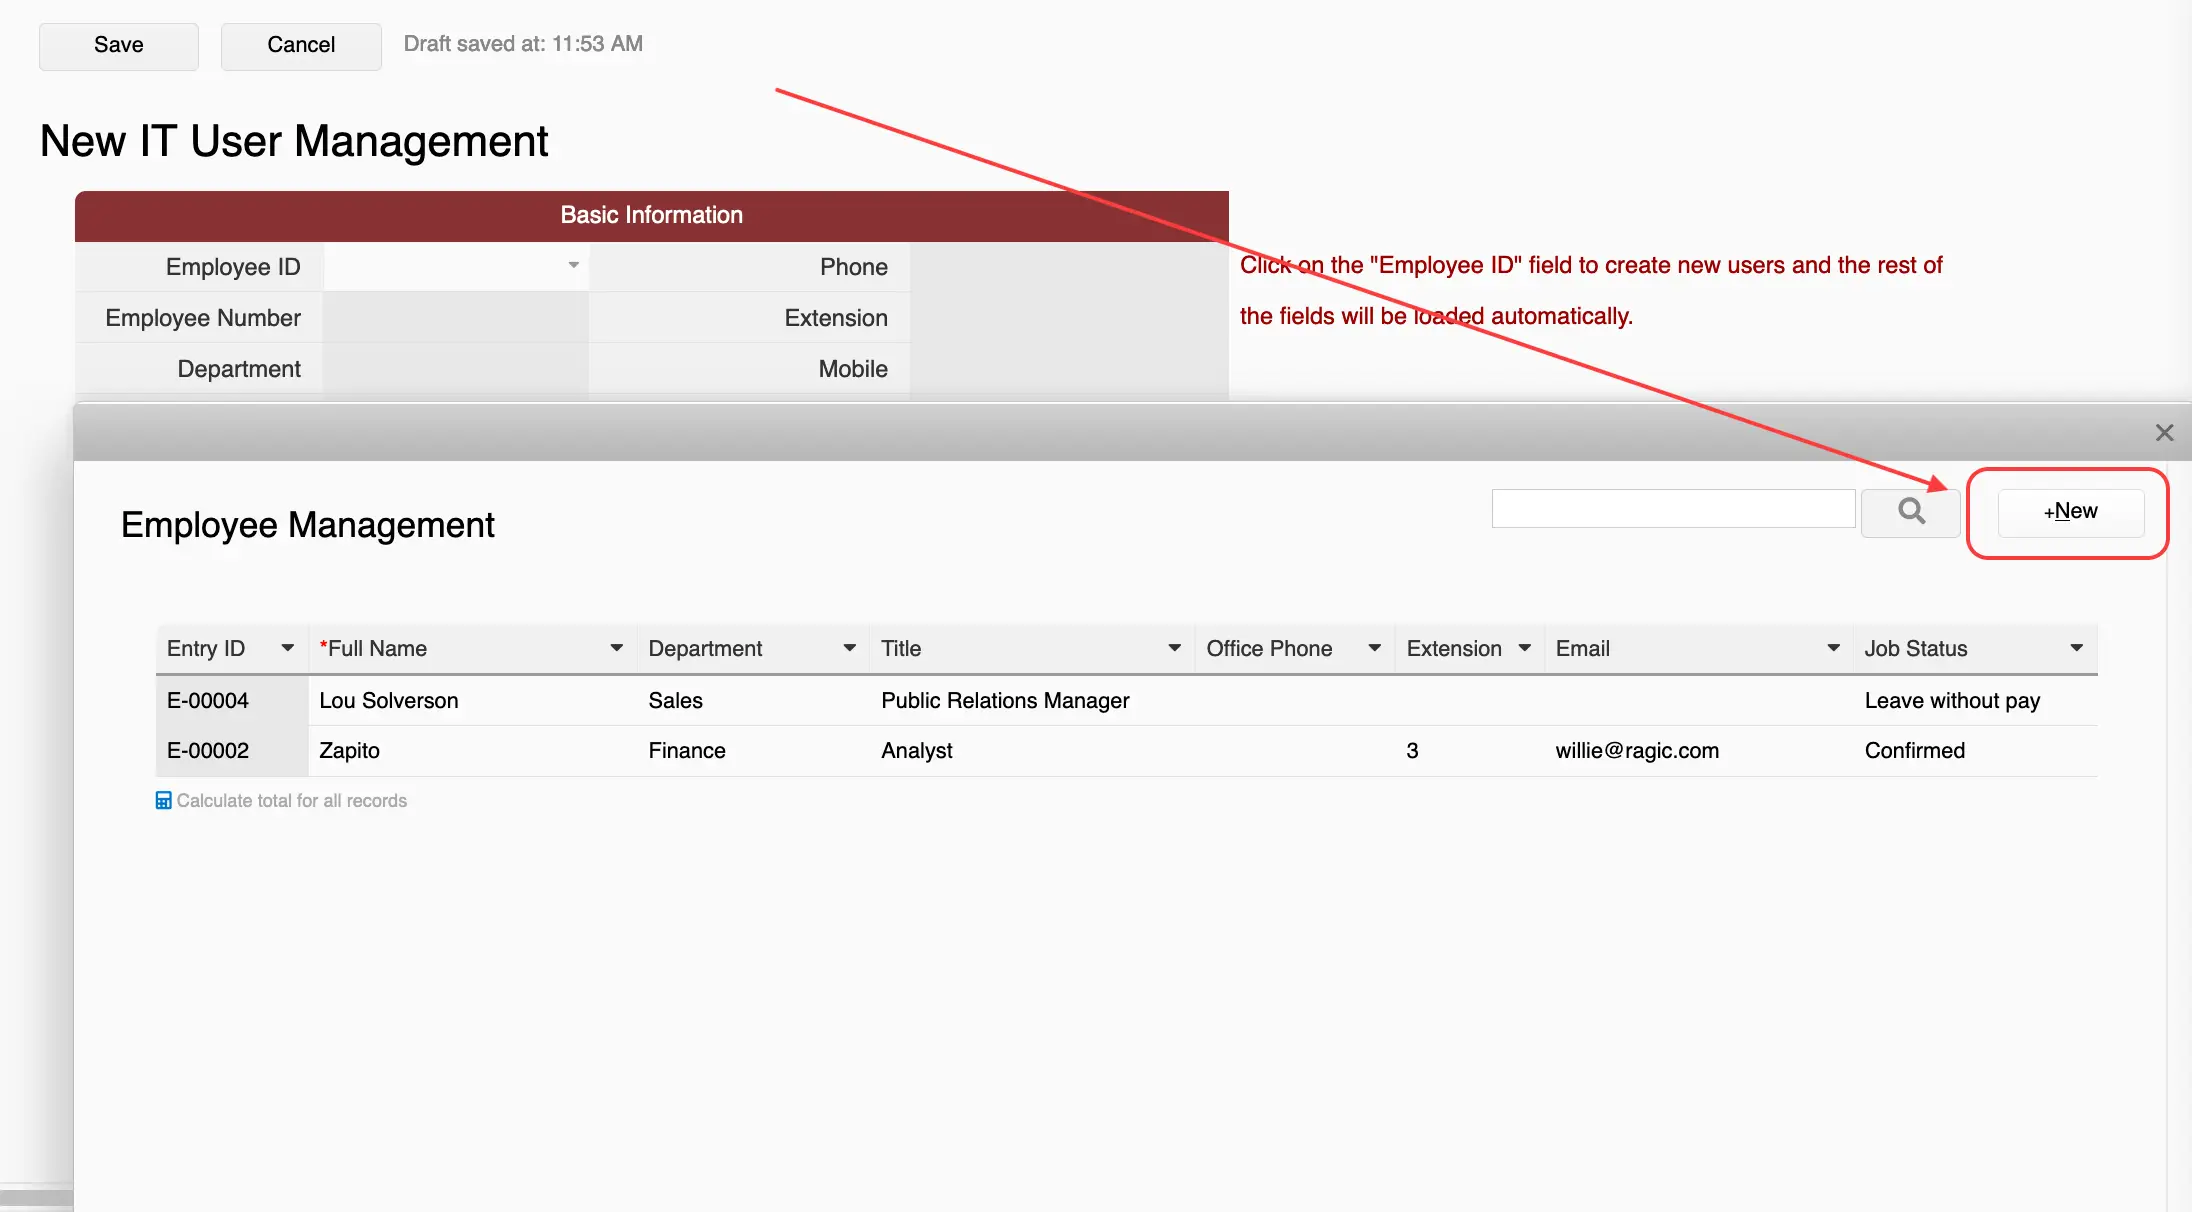
Once completed, the newly created user will be filled in automatically.
The "Hardware" and "Software" sections below are Reference Subtables that are automatically populated with information from the "Hardware Asset Management" and "Software License Allocation" sheets, respectively. Once the assigned software or hardware has been entered into the latter two sheets, the "IT User Management" sheet for the user will show the corresponding information.
If your company assigns computers for its employees, then you can record that information in the "Hardware Asset Management" sheet by creating one entry for each device, as shown below.
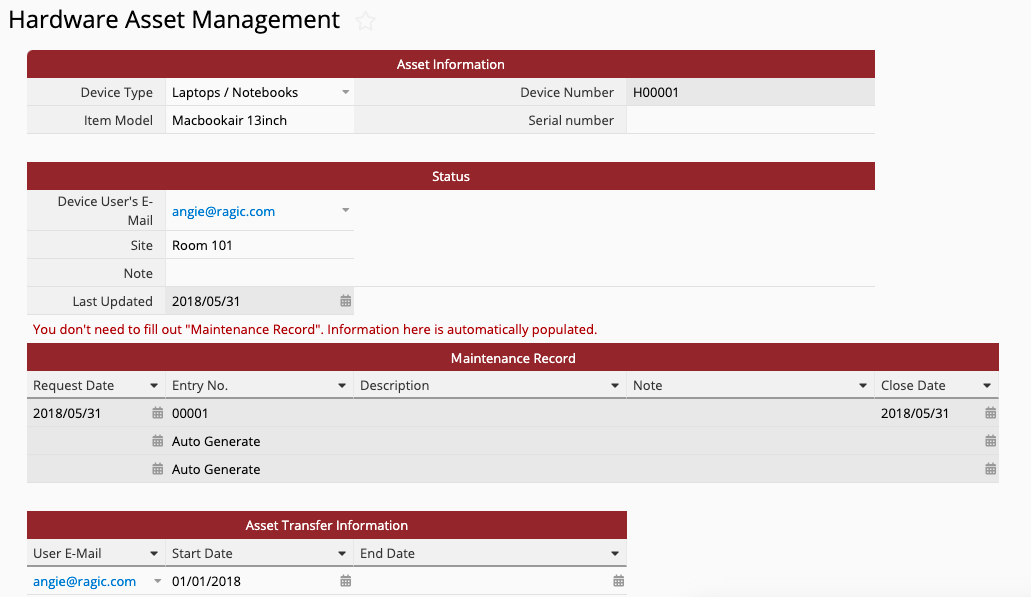
In the "Asset Information" section, the template has some default "Device Types", such as Laptops / Notebooks or Desktops. For the "Item Model", we recommend writing in the model name under which the device was sold. We also recommend filling in the device serial number if available. In this sheet, every new entry will automatically generate a new number in the "Device Number" field, which is a Unique Value for the particular device.
Note: If you want to use barcodes to manage these physical assets, you can consider creating a Barcode field and use a formula to set the value of the barcode field equal to the "Device Number" field. You can then use a Label Maker to print the barcodes and stick them on the corresponding assets.
This way, when you need to count or identify computer equipment, all you have to do is connect a scanner to the computer, open Ragic in your browser, move the cursor to the full-text search box, scan the barcode, and voila! You are shown the detailed equipment information. You can also use the Ragic App to do a barcode search. (See this page for details)
The "Status" section records information such as to whom the device is assigned and its current location. The user email is linked and loaded from the Email field of the "IT User Management" sheet. If the device had been assigned to different people at different points in time, you can record this information in the "Asset Transfer Information" section. The greyed out "Maintenance Record" section does not need to be filled out, as it is automatically filled by the "IT Request" sheet.
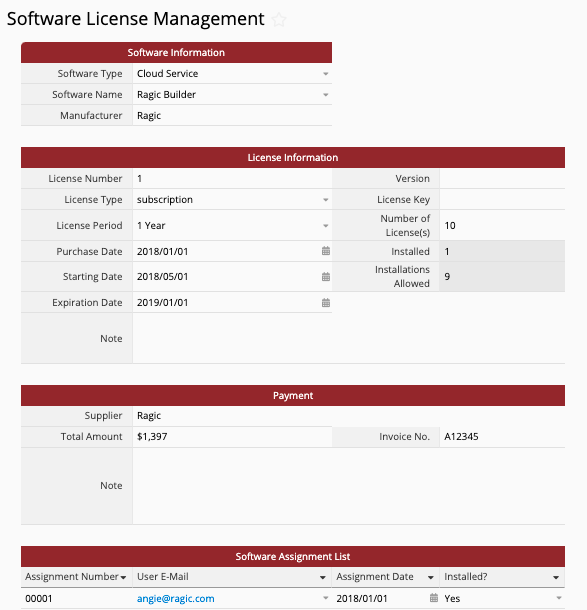
For software management, since you may buy several licenses of the same product (e.g., Microsoft Office or Ragic) to assign to different users, we have separated "buying licenses" and "assigning them" to users into two different sheets. The two sheets are linked to each other hierarchically; the "Software License Allocations" is a new sheet generated from the Subtable inside the "Software License Management" sheet.
Every time you purchase software, you can add a new entry inside "Software License Management". In that sheet, each entry represents one software purchase. A sample entry is shown below:
Once you've added a new entry in "Software License Management", the "Software License Allocation" sheet will generate data corresponding to the newly added data in the "License Allocation" Subtable. For example, if an entry in "Software License Management" has three new rows of data in the "License Allocation" Subtable, then the "Software Assignment List" sheet will also have three new assignment entries. If the "Software License Management" sheet has three entries, each with 3 software assignments, then the "Software License Allocation" sheet will have 9 entries.
A sample "Software License Allocation" entry is shown below.
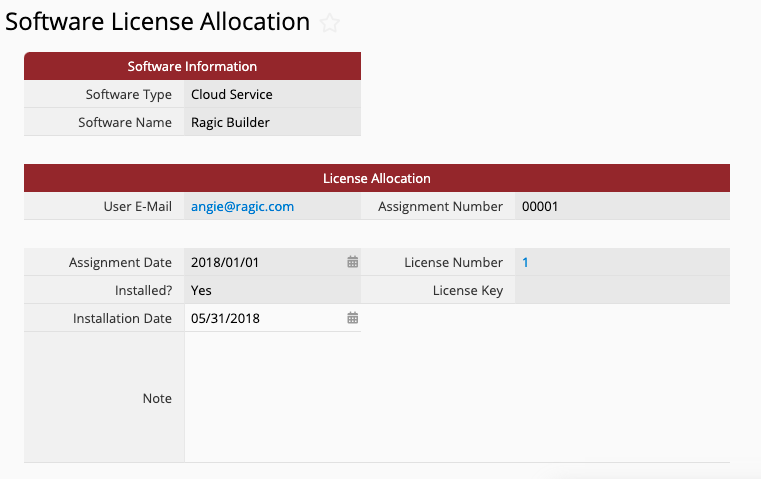
As you can see, aside from the "Installation Date" and "Note" fields, every other field is a greyed-out, Read Only field. These Read Only fields contain linked information from the "License Allocation" Subtable in the parent sheet. To avoid altering the data in the Subtable, it has been set to Read Only; you need to go to the parent sheet to add or edit the content.
The two writable fields in the "Software License Allocation" allow you to fill in more details.
If a company employee needs to set up a computer, install software, purchase software, or call an IT staff to look over a computer problem, communicating by phone or email is often less efficient than filling out a form. You can ask employees to fill out an "IT Request" sheet to expedite the process and allow tracking:
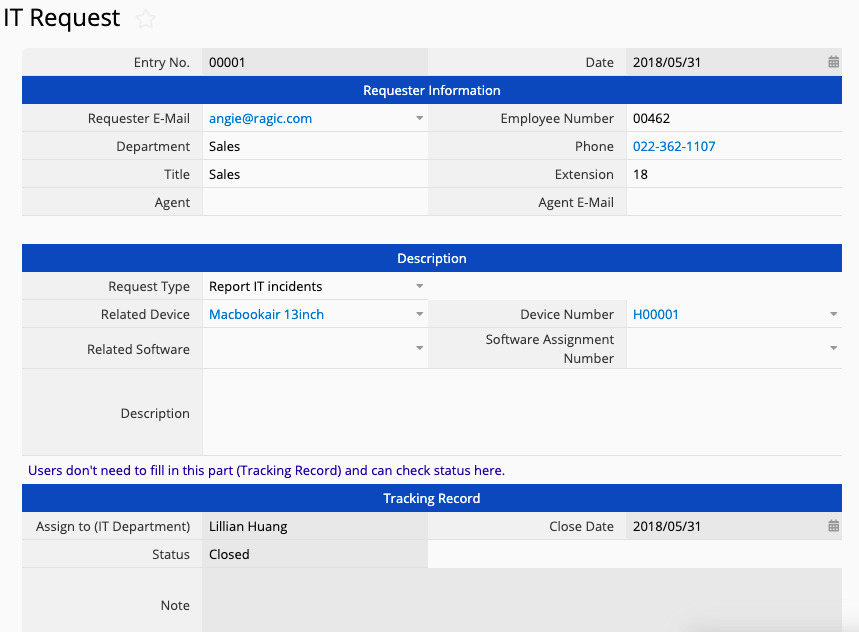
When you add a new entry (fill out a sheet), the system automatically generates an entry number and the current date. All you have to do is select the requester's e-mail, and the rest will be automatically filled in. If you are filling out the sheet for someone else, you can note this as well.
In the "Description" section, the default request types are "IT Installations" and "Report IT Incidents". If you select "IT Installations", the system automatically hides the fields for "Related Device", "Related Software", and their respective numbers (Conditional Formatting).
All you have to do is fill out the problem description. If you select "Report IT Incidents", you need to select the correct options from the list of related devices or software to give the IT staff more clues to work with. The "Tracking Record" section does not need to be filled out by the user. This is where you can check on the latest updated information from the IT staff without spending the time to email or call them.
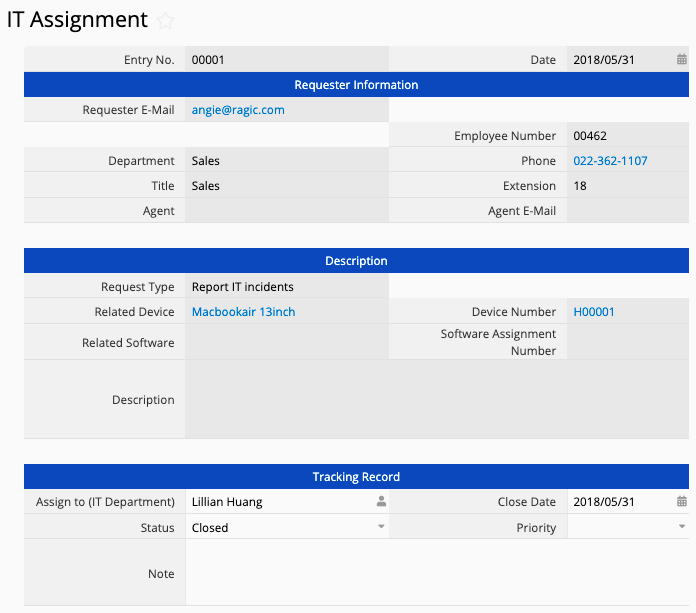
The "IT Assignment" sheet is a Multiple Version of the "IT Request" sheet. The two share their data, but with different Access Rights set up. Only users who are in the system default IT user group have Admin rights. Other users cannot see nor modify the data in this sheet, as it is meant for the IT or other relevant staff to assign tasks internally. You can go to the "Tracking Record" section to assign the task to someone and fill out the progress. The "Priority" field allows the assigned staff to rank their tasks by importance and is not visible to the requester.
You can also customize the sheets. For instructions on modifying the template, please refer to this article.
To adjust the numbering sequence only, please refer to this page. If you want to use your own numbering format, you can modify the auto-numbering format. If none of the available formats meet your needs, you can change the field type to Free Text or Numeric and enter the value manually, or apply a String Formula.
Still have questions? Shoot us an email at support@ragic.com!
 Thank you for your valuable feedback!
