n8n is a highly extensible workflow automation tool. Through a graphical interface, users can connect various applications, APIs, or databases as “nodes” to easily design automated processes for data retrieval, processing, and delivery. n8n supports self-hosting, meaning you can deploy it on your own server or in your cloud environment and maintain full control over data security and privacy.
Deploy a Self-Hosted n8n Instance
Because the Ragic Node is a community node, it isn’t available on n8n Cloud. To use it, you must self-host n8n and manually install the node.
Install the Ragic Node
1. In the n8n UI, click the menu at the lower-left → Settings → Community nodes.
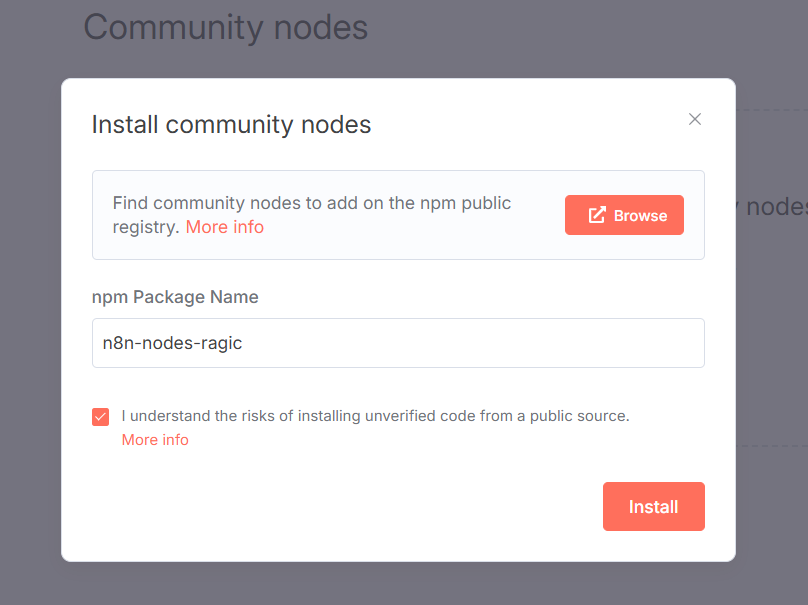
2. Click Install a community node.
3. In the popup, enter "n8n-nodes-ragic" in the “npm Package Name” field. Agree to the risks of using community nodes: select I understand the risks of installing unverified code from a public source. Click Install.
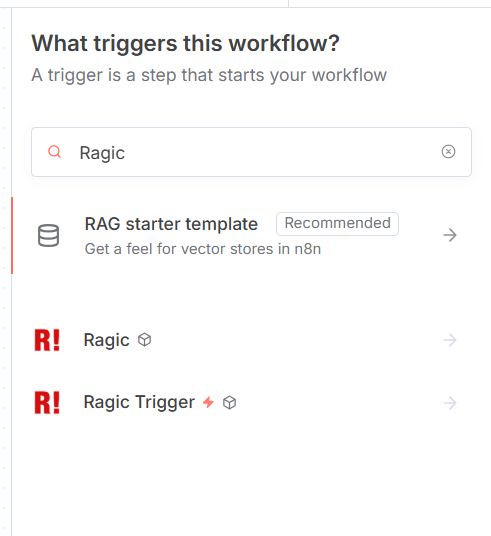
4. Once installed, you can find "Ragic" node and "Ragic Trigger" node in the workflow.
Ragic Trigger Node
Uses webhooks to start a workflow when the target form changes.
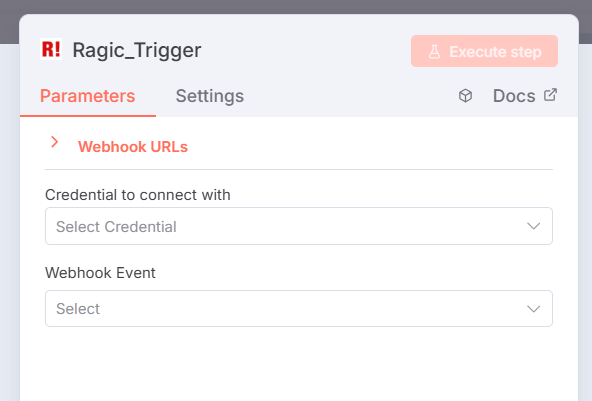
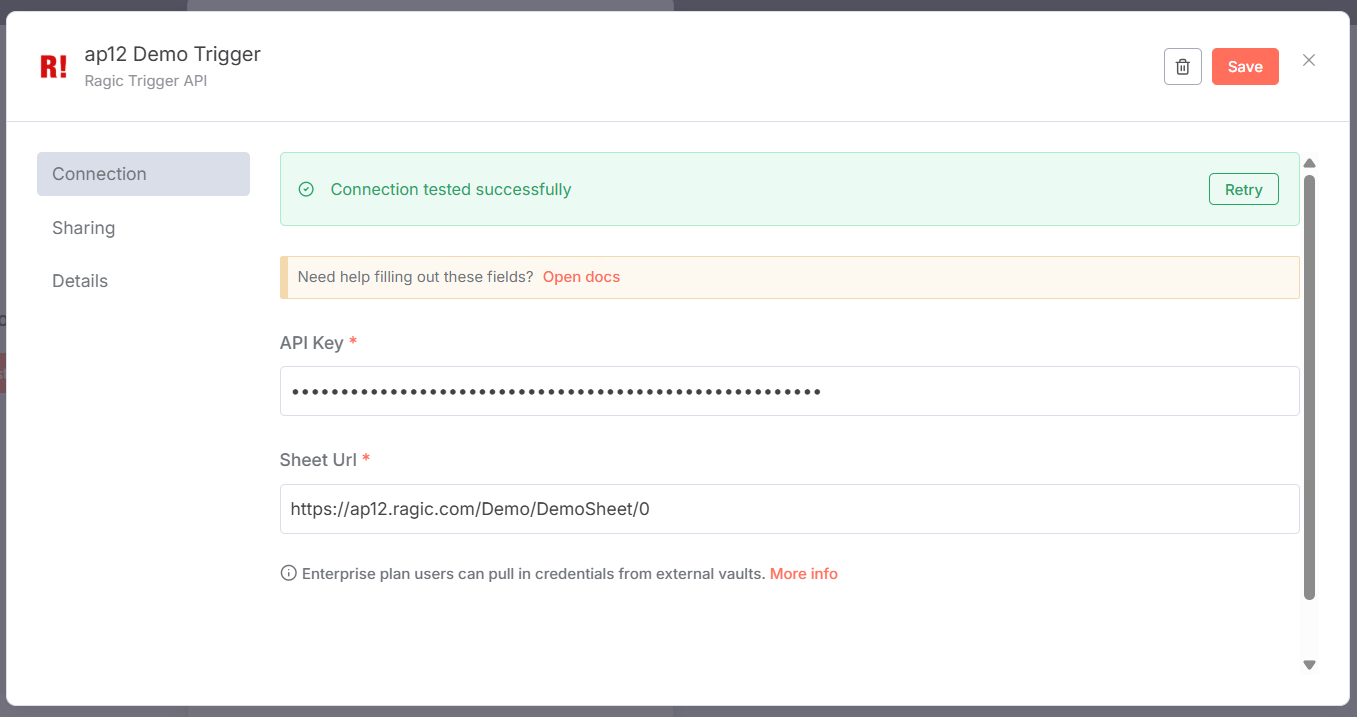
First, create credentials: in “Credential to connect with,” choose Create new Credential, then enter your API Key and the Sheet URL (the URL from “http” up to—but not including—the ? character), then save.
In the Event field, select one or more form events to listen for: Create Records, Update Records, or Delete Records.
Click Test step at the upper right; the node will open a temporary webhook listener. Make a change in the target form to confirm the trigger node works. (If you don’t receive a webhook, see Additional Notes.)
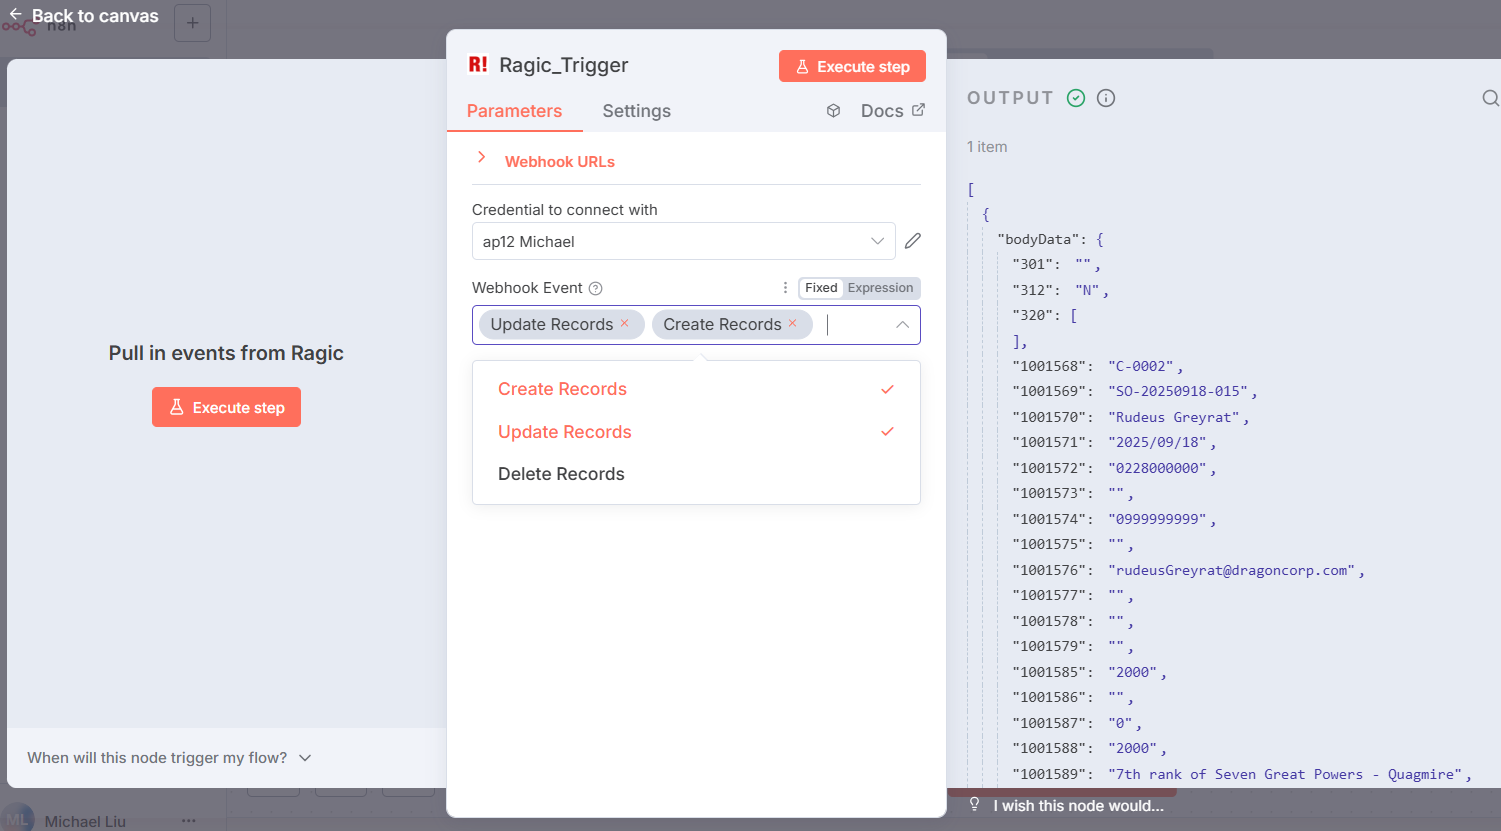
Note: When using the Ragic Trigger Node, you do not need to add a webhook setting in the Ragic form, nor will it appear in the form’s webhook settings.
Ragic Node (Action Node)
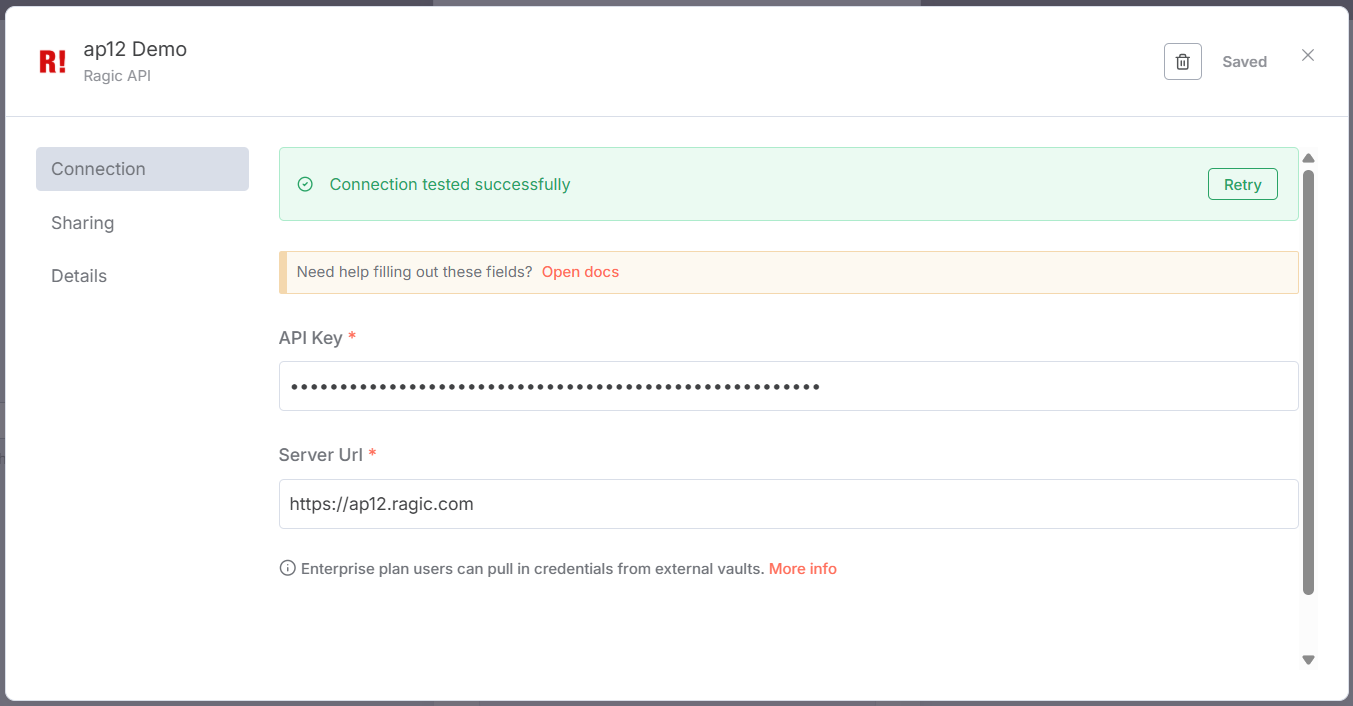
For first-time use, you will need to add a new Credential. In the "Credential to connect with" dropdown, select "Create new Credential". In the pop-up window, enter your API Key and your Server URL (e.g. https://www.ragic.com, https://ap12.ragic.com).
Note: Please enter the Root Server URL only; do not include any specific form paths.
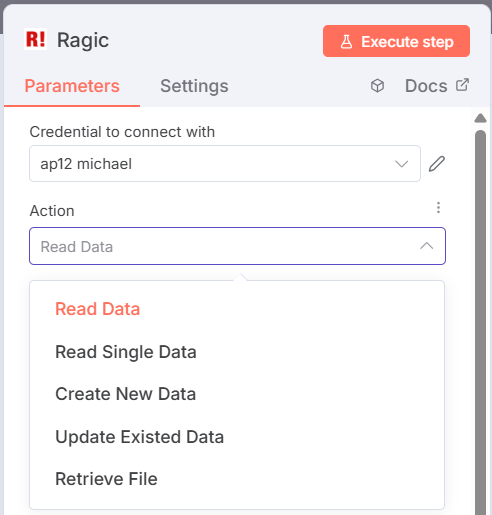
Next, select the feature you want to use from the "Action" dropdown. Currently supported functions include:
First, choose the target form from the "Form" dropdown. The dropdown only lists forms from the server set in your Credential where you have admin rights.
If the Action is "Read Single Data", you also need to set the target record’s "Record Index".
"Show Subtables" determines whether returned data includes subtables; "Ignore Masked" specifies whether to remove text masks (requires permission); "Limit" sets the maximum number of records to return.
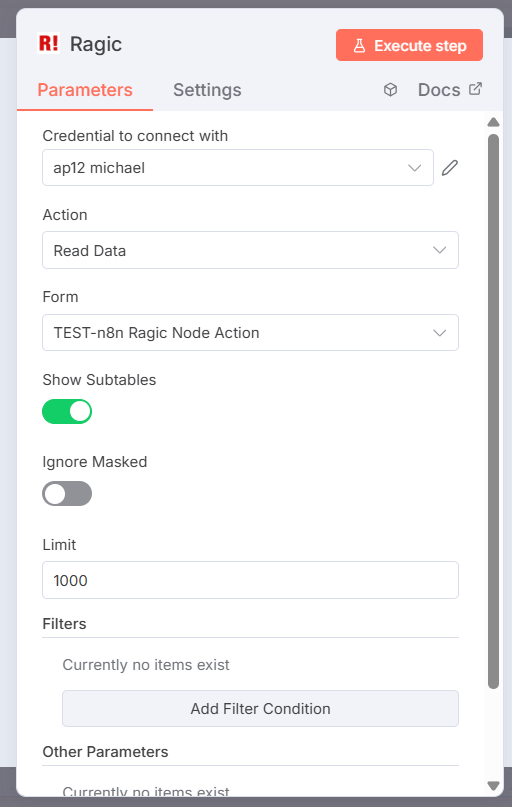
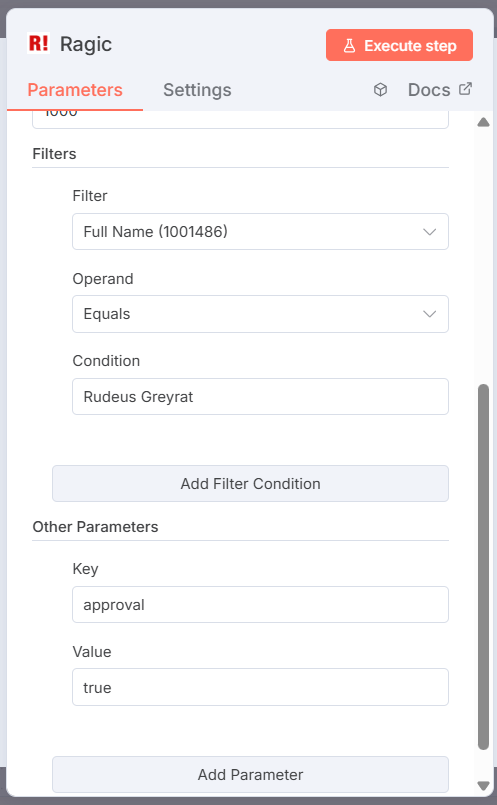
If the Action is "Read Data", you can add filters. See Filter Conditions.
You can also add additional parameters. See Other GET Parameters.
Ragic Node provides two methods for creating/updating data, which you can set in the Method field.

Then, as with Read Data, select the target form in the Form dropdown. If the Action is "Update Existed Data", also set the target record’s Record Index.
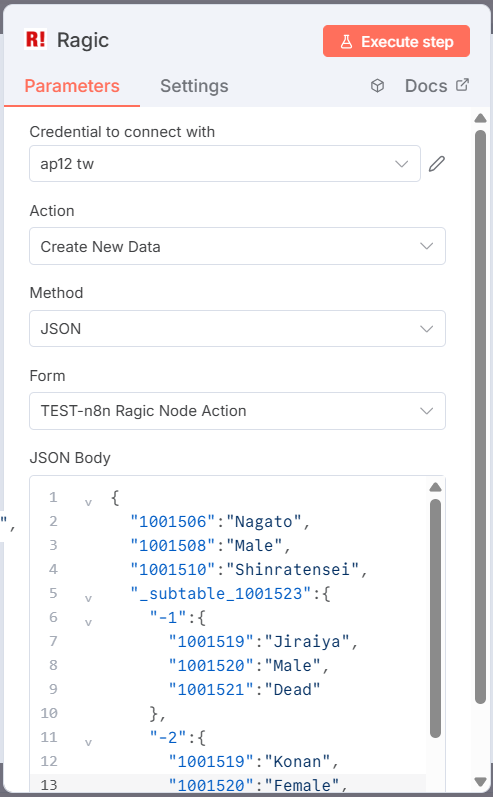
If Method is set to "JSON", directly write the data in the required format into the "JSON Body".
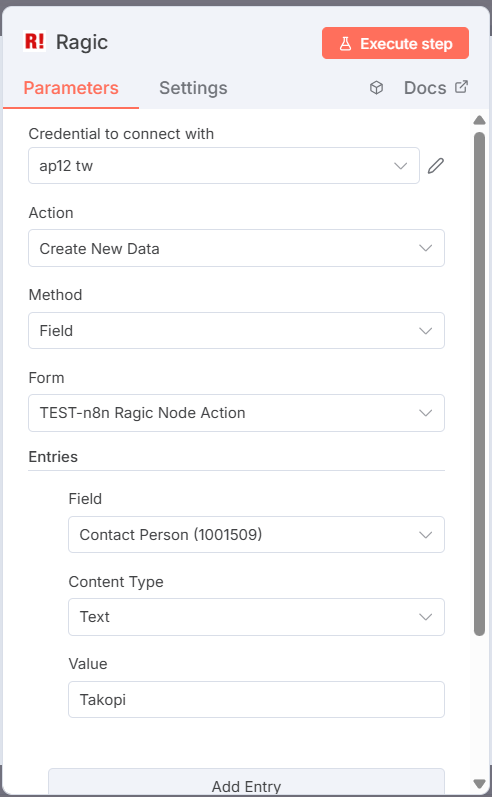
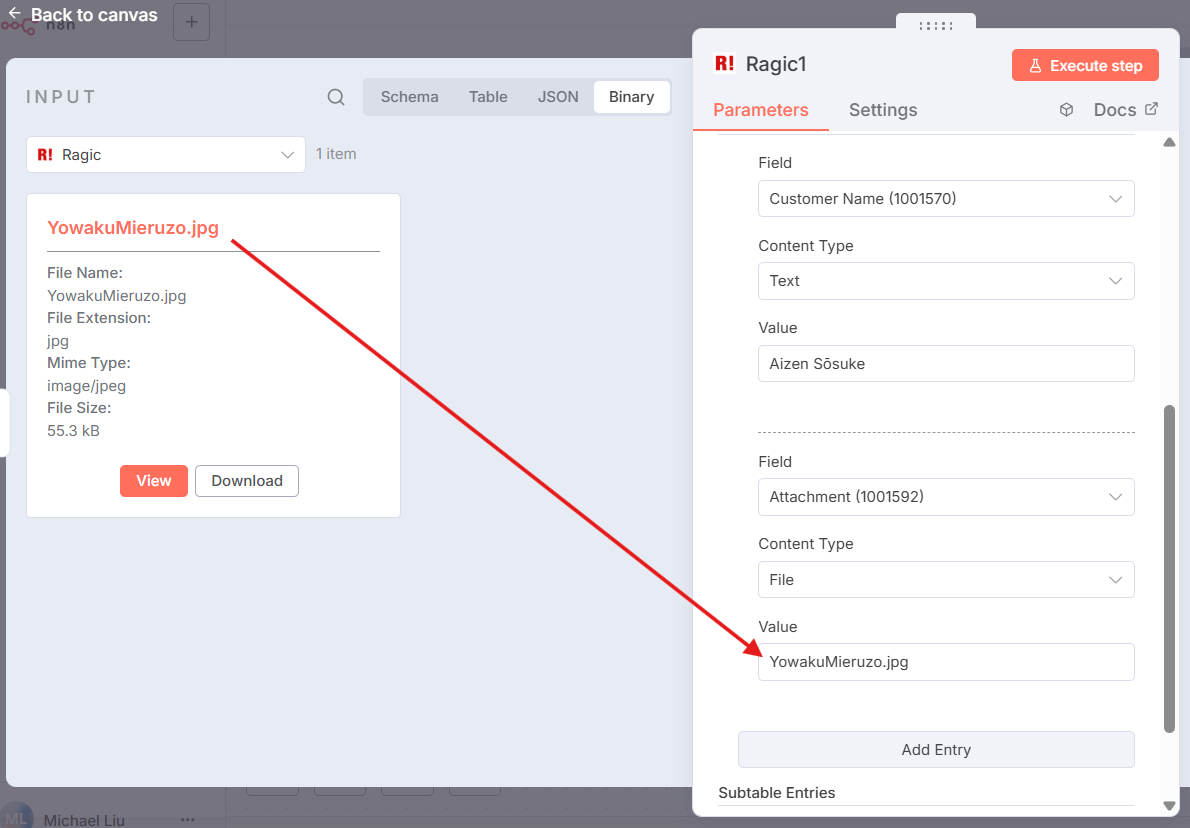
If Method is set to "Field", configure create/update content field by field. (For file uploads, you must use Field method.)
In Entries, click "Add Entry". A set of inputs will appear. Select the field from the target form, set Content Type (Text or File), and Value (the value to transfer).
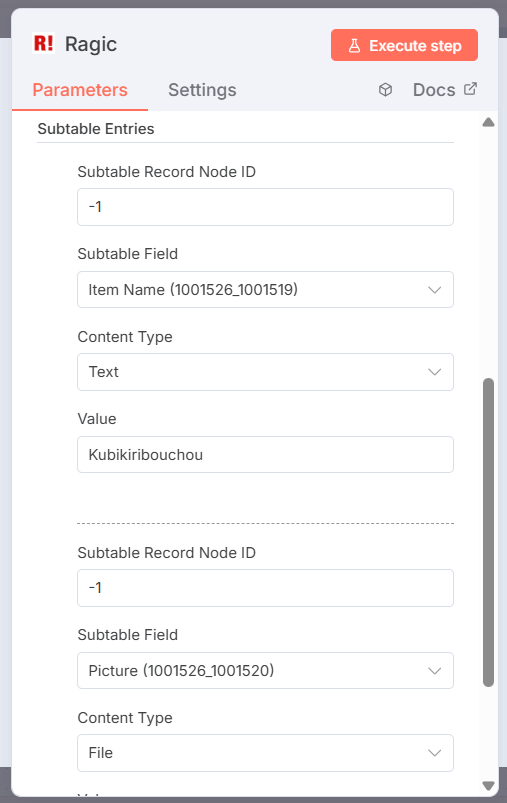
Subtable Entries work the same way, except they also require a "Subtable Record Node ID". For updating, use the node ID of the subtable record; for creating, use a negative integer. All entries in the same subtable record should share the same node ID.
Both "JSON" and "Field" methods can reference Creating a New Entry and Modifying an Entry.
Note: For multi-select fields, add multiple entries/subtable entries with the same field to achieve multi-select.
Note: Ragic Node’s file upload feature does not support local file uploads; files must come from the previous node. To upload local files, use other n8n nodes in combination.
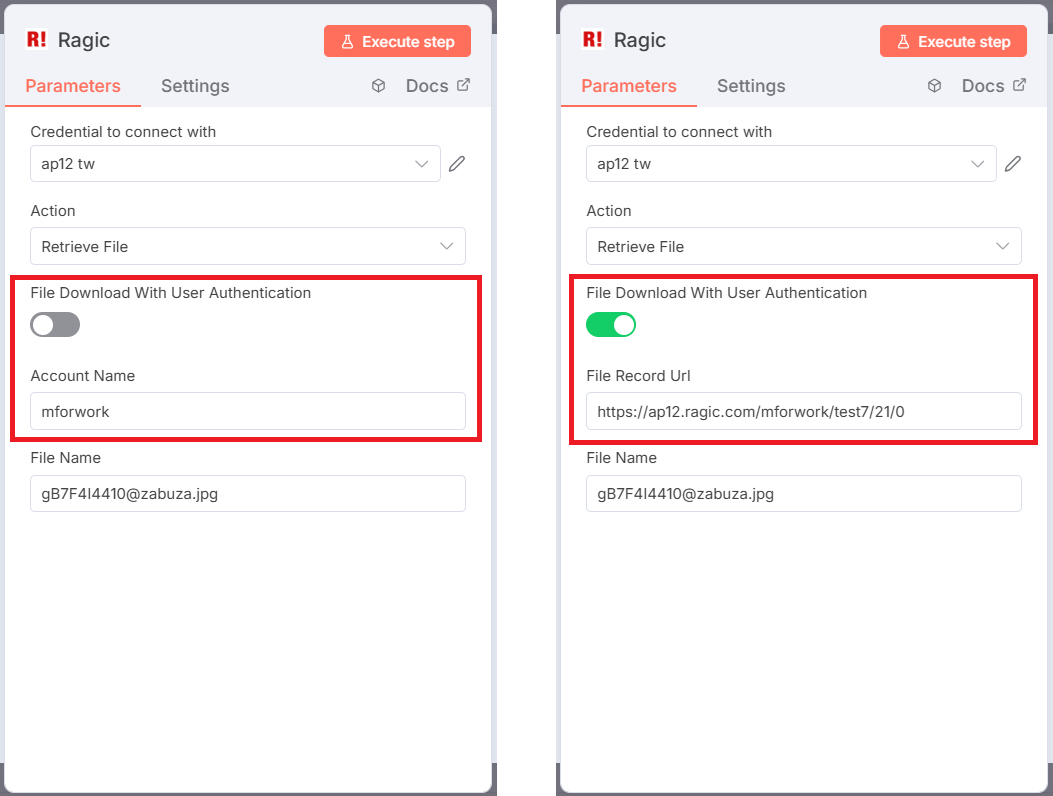
To retrieve uploaded files or images, first check if in your database Company Settings, the “File download permission control” is set to Yes (default is No).
If File Download With User Authentication is set to No, enter the database name in the "Account Name" field.
If File Download With User Authentication is set to Yes, enter the record URL where the file is in the "File Record Url field".
Finally, enter the file name in "File Name". Note: this is not the display name in the form, but the unique file name stored in the Ragic database (e.g. Ni92W2luv@My_Picture.jpg), which you can get via Ragic HTTP API (or via n8n Ragic Node Read Data Action).
First, choose the target form from the "Form" dropdown. The dropdown only lists forms from the server set in your Credential where you have admin rights.
Next, set the target record’s "Record Index".
Finally, in the "Action Button" dropdown, select the target button. The dropdown will only display action buttons from the form selected in the "Form" field.

Save and Activate Your Workflow
After designing your workflow, click Save at the upper right, then switch its status to Active.
 Thank you for your valuable feedback!
